
Prerequisites
- An Ownstak account with a fully set up organization
- An Astro.js project (version 4.x.x - 5.x.x)
- Node.js installed locally (version 18.x or higher)
Getting Started
1. Prepare your Astro.js project
Create a new Astro.js project by running:
npm create astro@latest
To enable server-side rendering (SSR), you'll need to install the @astrojs/node adapter and add it to your astro.config.mjs file. If your app is a fully pre-rendered static site, you can skip this step.
npm install @astrojs/node
import { defineConfig } from 'astro/config';
import node from '@astrojs/node';

export default defineConfig({
  adapter: node({
    mode: 'standalone',
  }),
  output: 'server',
});
For existing projects, remove any other provider’s adapter from your astro.config.mjs file.
Learn more at the official Astro documentation.
2. Deploy from your machine
Now, you can deploy the project from your machine by running:
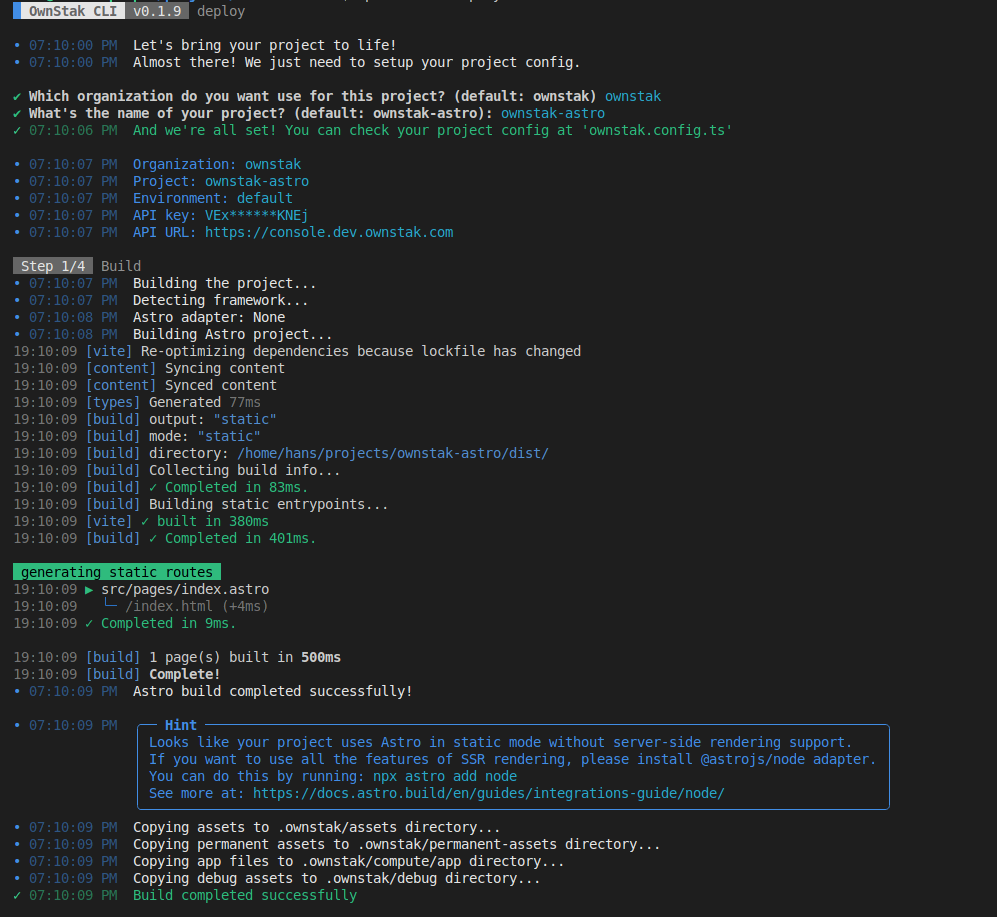
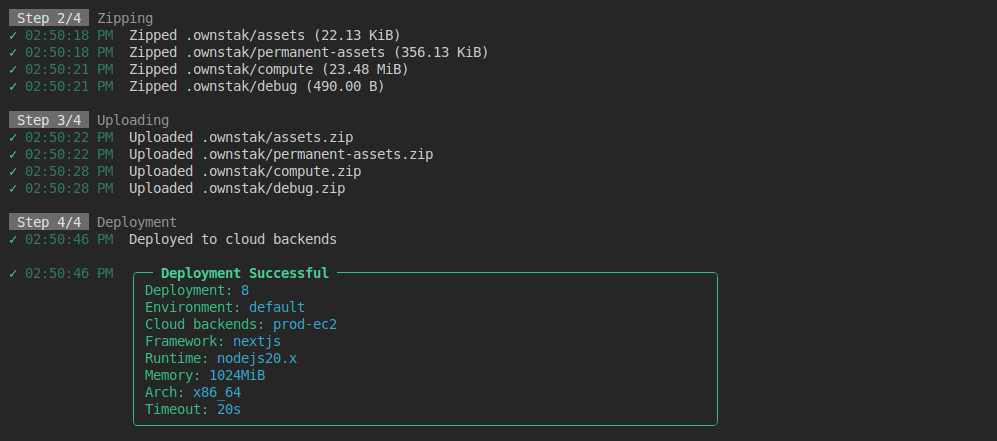
npx ownstak deploy
When you run the deploy command for the first time, the CLI will guide you through the login and project configuration setup. Simply follow the instructions:


The organization and project names are stored in the ownstak.config.js configuration file for subsequent deployments, so you won't be prompted for this information again.
3. Deploy from CI
For CI and other non-persistent environments, you can skip the interactive deployment by providing the API key and other required options as command arguments.
You can generate a new API key for your account or project in the Ownstak Console under Settings > API Keys.
npx ownstak deploy --api-key=<your-secret-key> --organization=ownstak --project=ownstak-astro --environment=default
4. Done!
Your project is now live and deployed to your organization's cloud infrastructure. You can visit and test it using the environment and deployment links provided in the output:
- Environment link – Always points to the latest deployment in a given project environment
Example:
my-astro-app-development.aws-primary.my-org.ownstak.link - Deployment link – Always points to a specific deployment
Example:
my-astro-app-development-10.aws-primary.my-org.ownstak.link
Local testing
If your project doesn't behave as expected, you can build and test it locally before deploying.
1. Build the project
Run the following command in your project directory to build your project without deploying it:
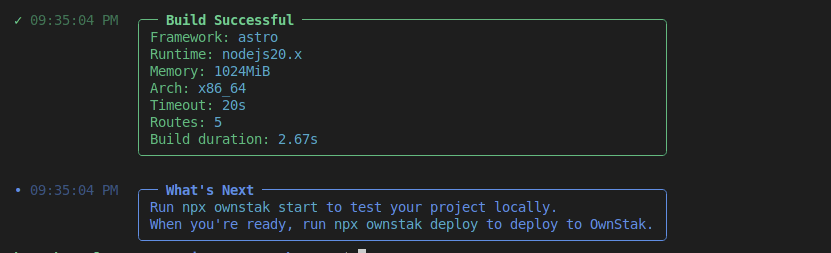
npx ownstak build
2. Start the project
Start the project and make sure it works for you locally with Ownstak:
npx ownstak start
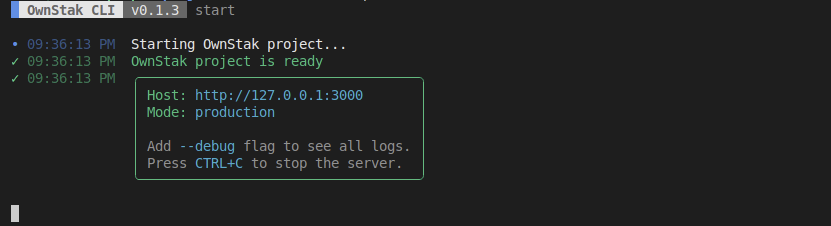
When you see the ready message, you can visit http://127.0.0.1:3000 (or the different outputted URL) in your browser.
Caching
The OwnStak by default sets different cache-control headers for assets, permanent assets and pre-rendered pages with reasonable time for your CDN
for the best performance. It's expected to do cache purge via Webhooks after every deployment.
See CDN Configuration. Default Cache-control headers can be overridden.
Headers
Custom HTTP headers can be dynamically set from SSR pages or you can define static headers in your ownstak.config.js file.
import { Config } from 'ownstak'

export default new Config()
  // Apply headers to specific paths
  .setResponseHeaders({ "Cache-Control": "public, max-age=31536000" }, "/assets/:path*")
  // Apply headers to all paths
  .setResponseHeaders({
    "X-Frame-Options": "DENY",
    "X-Content-Type-Options": "nosniff",
    "Cache-Control": "public, max-age=31536000"
  })
Redirects
Custom redirects can be dynamically set from SSR pages or you can define static redirects in your ownstak.config.js file.
import { Config } from 'ownstak'

export default new Config()
  .setRedirect('/old-page', '/new-page')
  .setRedirect('/api/:path*', '/new-api/:path*', 301)
Supported features
Ownstak supports most Astro.js features. Here's a complete list of what you can expect: