Origin Configuration
When setting up your CDN, you need to point it to your environment's backend URLs. These URLs are visible in your environment overview page in the OwnStak Console. You should configure one origin per cloud backend in your environment.
Header Configuration
To ensure proper routing and functionality, your CDN must be configured to send the correct host header. You have two options:
Option 1: Using Host Header
Configure your CDN to send the Host header matching the host from your environment link. If you need to preserve the original host, you can use the X-Forwarded-Host header to pass it through. The OwnStak Proxy by default preserves the received Host in the X-Forwarded-Host header when serving traffic.
Example configuration:
Host: your-environment.backend1.your-org.ownstak.link
X-Forwarded-Host: your-original-domain.com
The X-Forwarded-Host header can contain multiple comma-separated values when a request passes through multiple proxies that override the Host header. For example: your-original-domain.com, another-domain.com. Ensure that your application correctly parses and validates the header in this case.
Option 2: Using X-Own-Host Header
Alternatively, you can use the X-Own-Host header to specify the environment host:
X-Own-Host: your-environment.backend1.your-org.ownstak.link
Guides
AWS CloudFront
AWS CloudFront is a global content delivery network that integrates seamlessly with other AWS services. The guide below shows you how to configure it for simple OwnStak setup through the AWS Console. Advanced users can use other configuration options.
- Log into AWS Console
- Go to console.aws.amazon.com and navigate to CloudFront
- Ensure you're in the correct AWS region
- Create Distribution
- Click Create Distribution
- Select Single website or app
- Click Next
- Specify Origin Type
- Origin Type: Select
Other - Origin Domain: Enter your environment link hostname (e.g.,
nextjs-prod.backend1.your-org.ownstak.link) - Origin Path: Leave empty
- Origin Settings: Select
Customize origin settings - Add custom header: Click on
Add header→ Add Header with name:x-own-hostand your environment link hostname as value (e.g.,nextjs-prod.backend1.your-org.ownstak.link) - Click Next
- Origin Type: Select
- Security Settings
- Web Application Firewall (WAF): Configure additional security protections or select
Do not enable security protectionsfor now. - Click Next
- Click Create distribution
- Web Application Firewall (WAF): Configure additional security protections or select
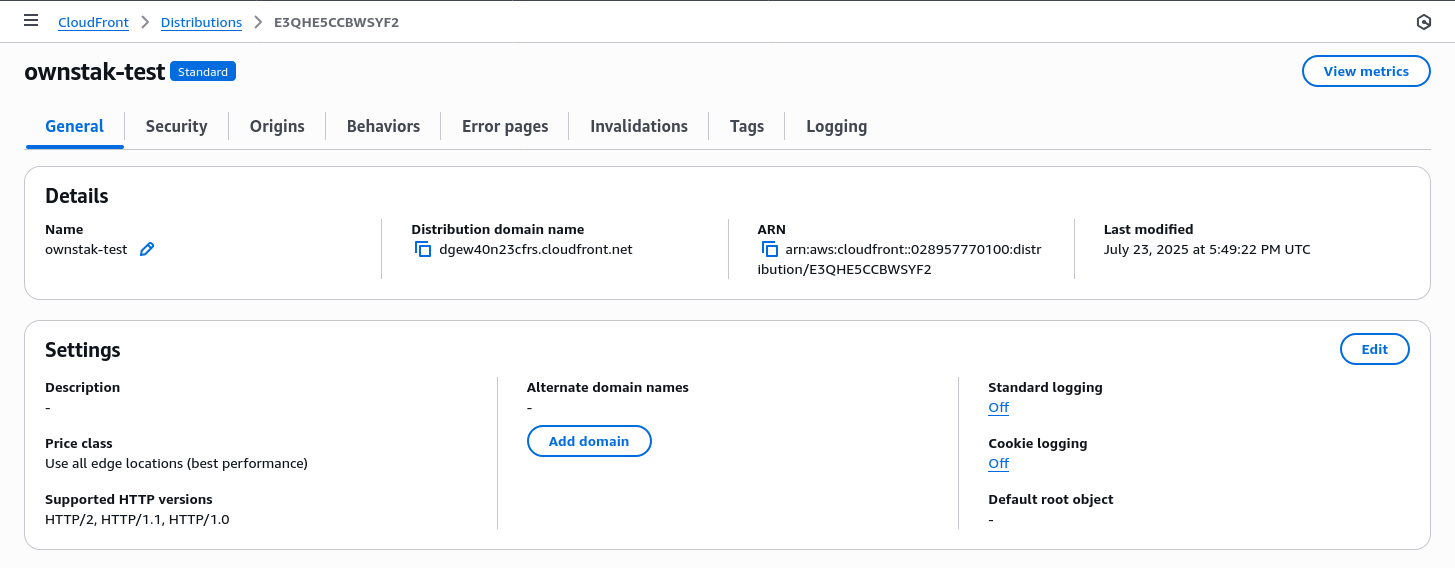
- Configure Alternate Domain Names (CNAMEs)
- In the Settings → Alternate domain names section click on Add domain
- Alternate domain names (CNAMEs): Add your domain (e.g.,
www.your-domain.com) - SSL Certificate: Import a certificate for your domain or request new certificate and perform domain validation through the CNAME record.
- Minimum protocol version: Select at least TLSv1.2
- Create DNS Record
- Go to your domain's DNS provider (Route 53, Cloudflare, Namecheap, etc..)
- Create a CNAME record:
- Name: Your sub/domain (e.g.,
wwwor@as root domain) - Value: Your Cloudfront distribution domain name (e.g.,
d1234abcd.cloudfront.net) - TTL: 300 seconds (or as preferred)
- Name: Your sub/domain (e.g.,
- Done
- Your site is ready to receive traffic through CloudFront
- Other environments can be configured with additional distributions or behaviors
Cloudflare
Cloudflare is a popular CDN provider with a generous free tier. The guide below shows you how to configure it for a simple OwnStak setup through the UI. Advanced users can use other configuration options.
- Log into Cloudflare Dashboard
- Go to dash.cloudflare.com and select your domain
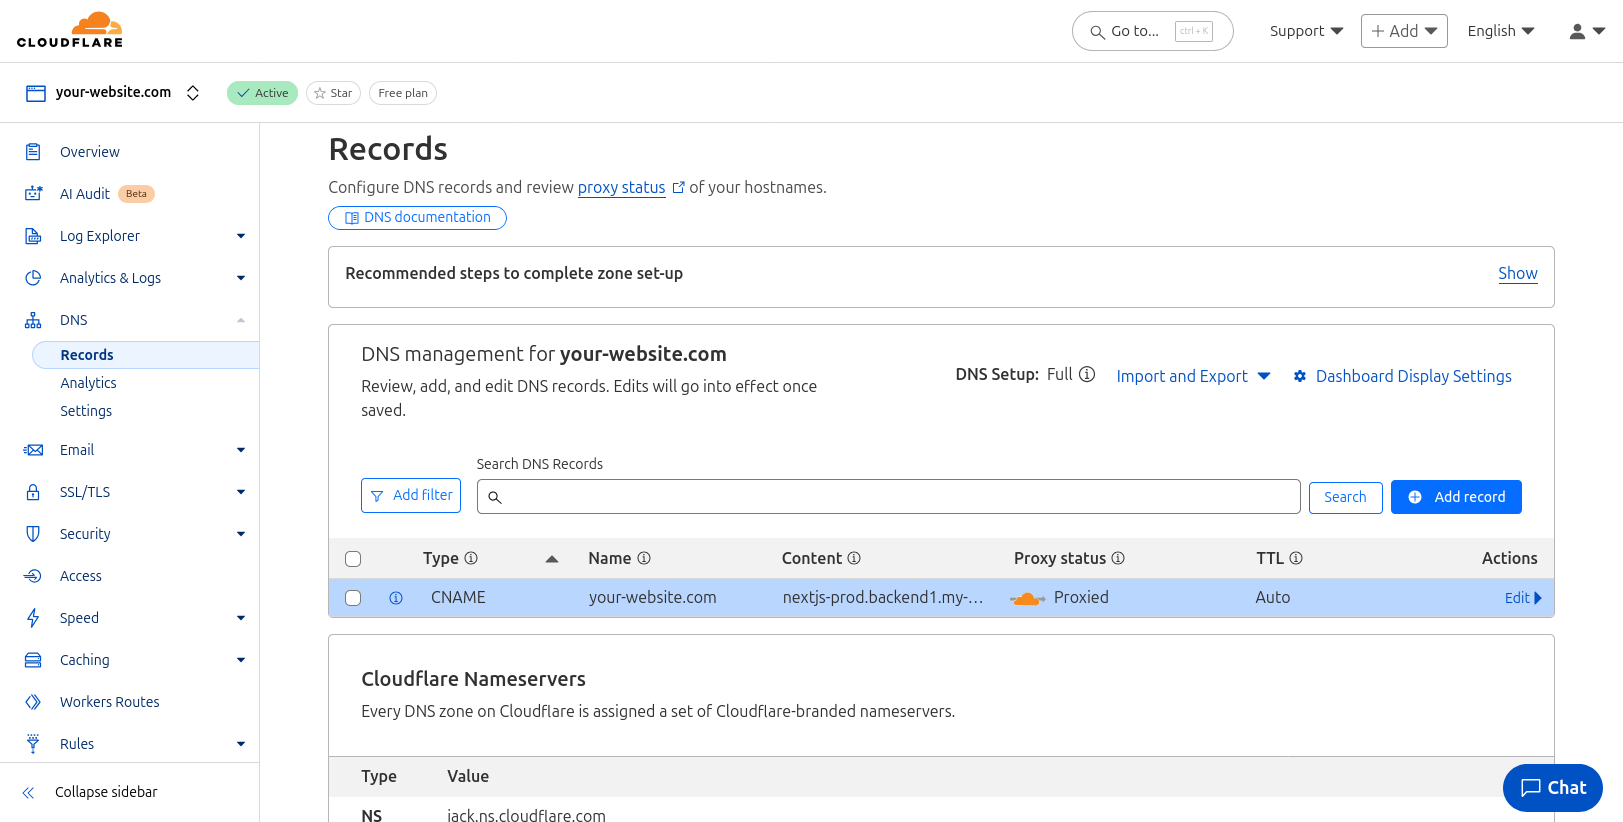
- Navigate to DNS settings
- Go to DNS → Records
- Click Add record
- Create new CNAME Record
- Type:
CNAME - Name: Your sub/domain (e.g.,
www, or@for root domain) - Target: Your environment link hostname (e.g.,
nextjs-prod.backend1.your-org.ownstak.link) - Proxy status: Enable the proxy (orange cloud)
- TTL: Keep
Auto
- Type:
- Save the Record
- Click Save to create the CNAME record
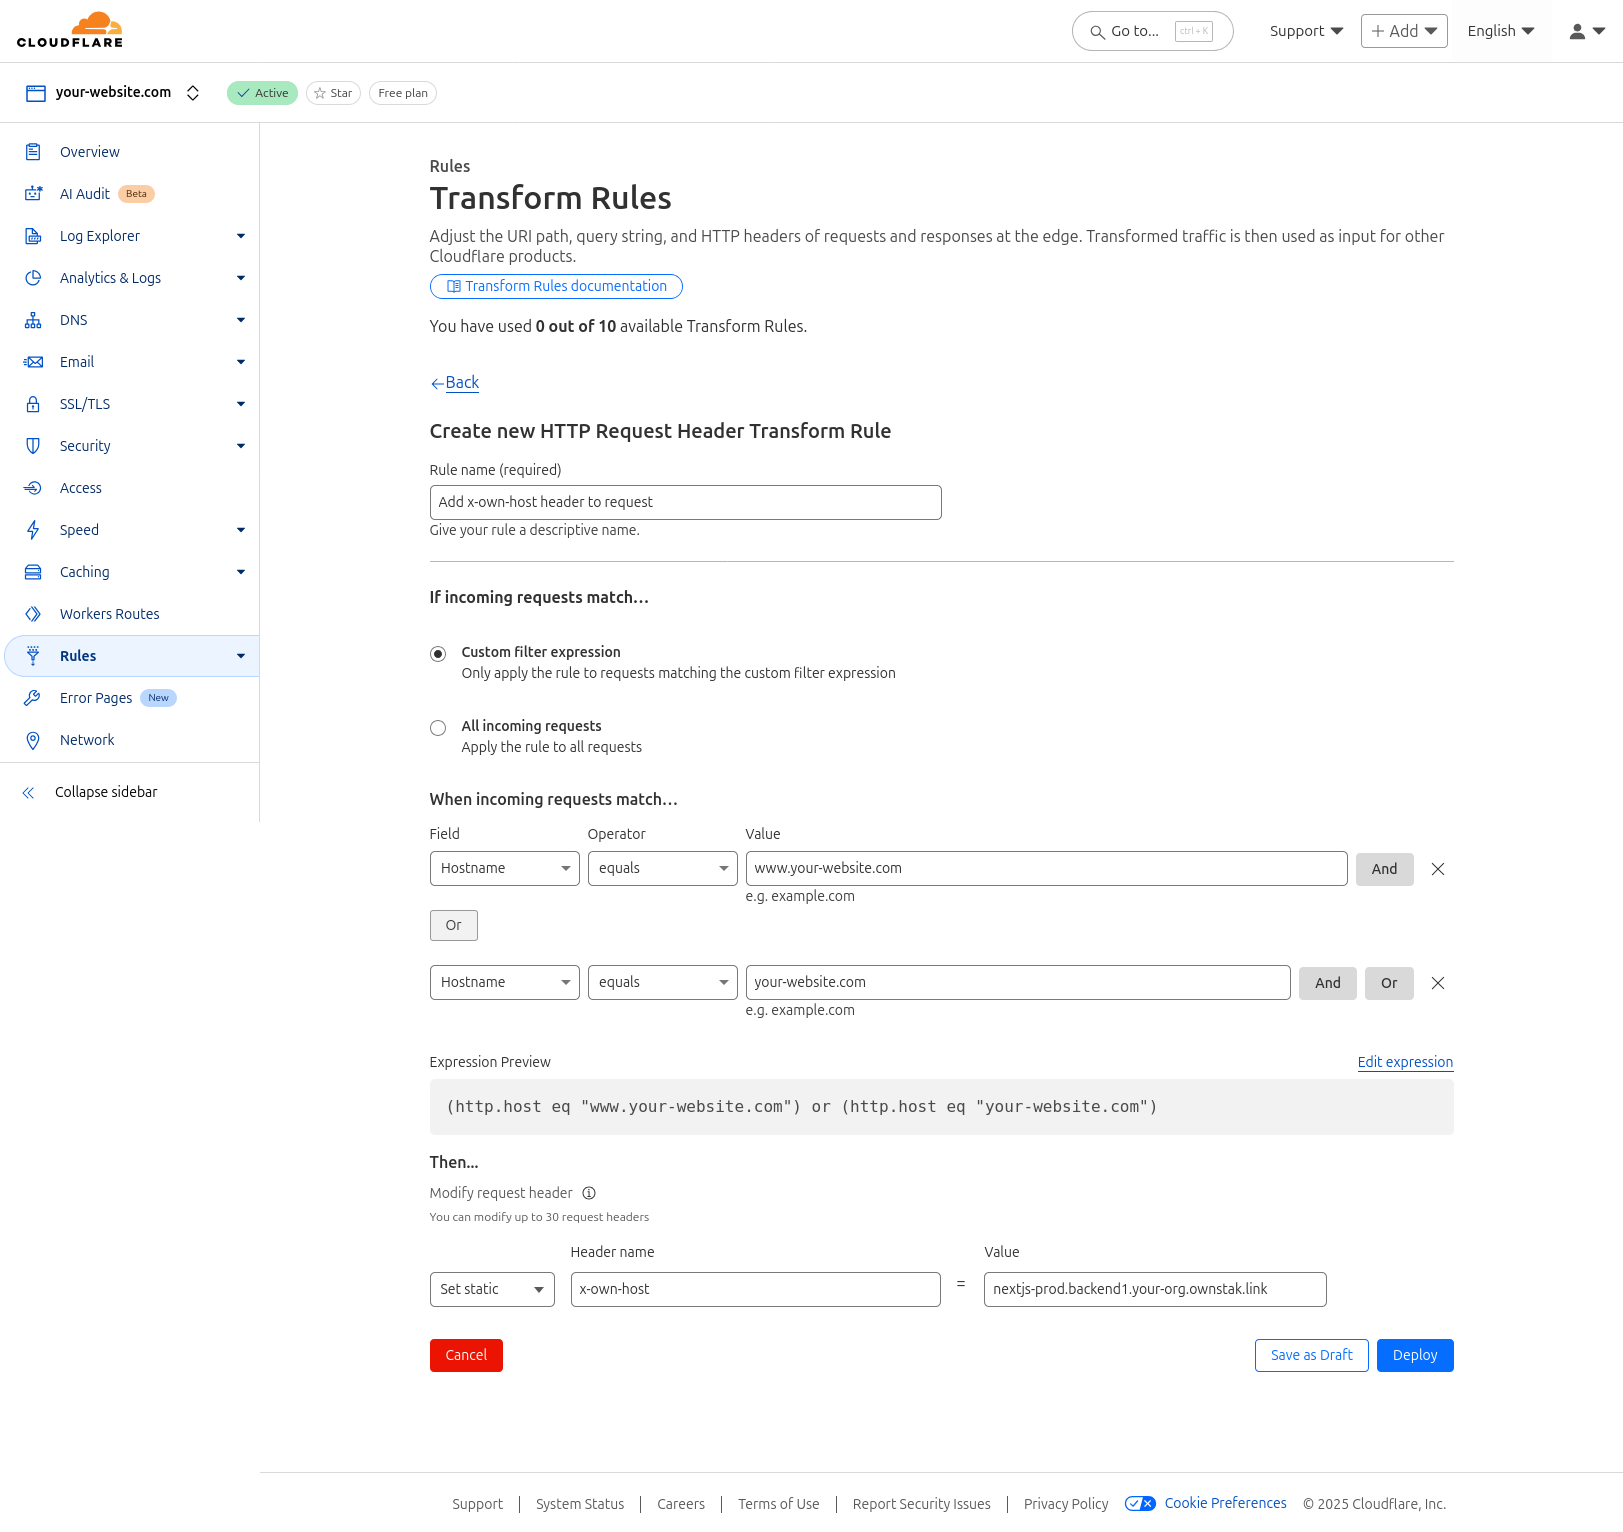
- Navigate to Rules settings
- Go to Rules → Overview
- Click Create rule → Request Header Transform Rule
- Request Header Transform Rule
- Rule name:
Add x-own-host header to requestor any other name - If incoming requests match:
Custom filter expression→ Field:Hostname, Operator:Equals, Value:www.your-domain.com - Then:
Modify request header
- Rule name:
- Set Header Configuration
- Operation:
Set static - Header name:
x-own-host - Value: Your environment link hostname (e.g.,
nextjs-prod.backend1.your-org.ownstak.link)
- Operation:
- Save the Rule
- Click Deploy to activate the new rule
- Done
- Your site is ready to receive traffic. Other environments can be configured the same way.
Cache Clearing
After each deployment, you'll need to clear your CDN cache to ensure users receive the latest version of your application.
Each CDN provider has its own method for cache invalidation:
- AWS CloudFront: Use the AWS Console or CLI to create invalidation requests for specific paths or the entire distribution
- Cloudflare: Use the Cloudflare dashboard or API to purge cache for specific URLs or the entire zone
For automated cache clearing, integrate the appropriate CDN API calls into your CI deployment pipeline to trigger cache invalidation immediately after successful deployments.
We're actively working on deeper integrations with popular CDN providers to streamline the setup and management process.