
Prerequisites
- An Ownstak account with a fully set up organization
- Node.js installed locally (version 18.x or higher)
Overview
OwnStak comes with predefined framework adapters for various frameworks. In cases where you need full control over the build and deployment process or you just want to deploy your custom Node.js app, there's a custom framework option. This option allows you to deploy any kind of Node.js HTTP application, including:
| Framework | Description | Icon |
|---|---|---|
| Express.js | Fast, unopinionated web framework for Node.js |  |
| Hono | Hono Web application framework |  |
| Fastify | Fast and low overhead web framework |  |
| Koa.js | New web framework designed by the team behind Express |  |
| Plain HTTP | Native Node.js HTTP server |  |
Getting Started
1. Create a new plain project
mkdir my-custom-project
cd my-custom-project
npm init
2. Prepare your Node.js application
Ensure your application has a main entrypoint file (e.g., server.js, app.js, index.js) that starts your server.
For example, a basic Express.js application will look like this:
import express from 'express';

// The PORT env variable is provided by OwnStak
const PORT = process.env.PORT || 3000;
const HOST = process.env.HOST || '0.0.0.0';

const app = express();
app.get('/', (req, res) => {
  res.json({ message: 'Hello from Ownstak!' });
});

app.listen(PORT, HOST, () => {
  console.log(`Server running on http://${HOST}:${PORT}`);
});
3. Create a new OwnStak config
Create a new OwnStak config in your project root by running the command below or copying the example:
npx ownstak config init
Open the created ownstak.config.js file and configure the required options.
Here's the example config for simple express server:
import { Config } from 'ownstak';

export default new Config()
  .setFramework("custom")
  .setAppEntrypoint("./server.js")
  .setCopyAppDependencies(true)
Framework Type
.setFramework("custom")
This tells OwnStak to use the custom framework mode, which gives you full control over the build and deployment process without any framework-specific optimizations.
Application Entrypoint
.setAppEntrypoint("./server.js")
This specifies the main file of your application that starts the HTTP server. This file will be executed when your application starts. Make sure this file properly starts your server and listens on the port provided by the PORT environment variable.
Dependency Management
.setCopyAppDependencies(true)
This tells OwnStak to automatically trace and copy all dependencies (node_modules, source code files) that your entrypoint file requires. This means you don't need to manually include dependencies in your build - OwnStak will analyze your code and include everything needed.
Alternative: Bundle Dependencies
.setBundleAppDependencies(true)
Instead of copying dependencies, this bundles everything into a single entrypoint file if possible. This can result in faster startup times but may not work with all types of dependencies and project type. The output format is selected based on input. ESM or CJS.
Include Additional Files
.includeApp("my-config.json")
If your application dynamically imports or reads files (like JSON, JS config files), you can explicitly include them in the deployment compute. This ensures files that aren't statically analyzable are still included.
Include Files with Glob Patterns
.includeApp("src/**/*.{json,yml}")
You can use glob patterns to include multiple files. This is useful for including all configuration files or other assets that your application needs at runtime.
Include Files with Custom Destination
.includeApp("src/**/*.{json}", "dist/**/*")
You can specify a different destination path for included files. The first parameter is the source pattern, and the second is the destination pattern inside ownstak build folder.
Include Static Assets
.includeAsset("index.html")
For static assets that you want to serve to users but aren't needed by your application code (like HTML files, images, CSS, images, videos), use the includeAsset option. These files will be available for serving but won't take the space in application compute bundle.
Convert HTML Files to Folder Structure
.setConvertHtmlToFolders(true)
This option converts all HTML assets to folder structure format. For example, /about.html becomes available at /about/. This is useful for creating clean URLs without file extensions.
4. Build the project
Run the following command in your project directory to build your project locally without deploying it:
npx ownstak build
5. Start the project
Start the project and make sure it works for you locally with OwnStak:
npx ownstak start
6. Deploy from your machine
If everything works, you can try to deploy your custom Node.js application:
npx ownstak deploy
When you run the deploy command for the first time, the CLI will guide you through the login and project configuration setup. Simply follow the instructions:


The organization and project names are stored in the ownstak.config.js configuration file for subsequent deployments, so you won't be prompted for this information again.
7. Deploy from CI
For CI and other non-persistent environments, you can skip the interactive deployment:
npx ownstak deploy --api-key=<your-secret-key> --organization=ownstak --project=my-custom-app --environment=default
8. Done!
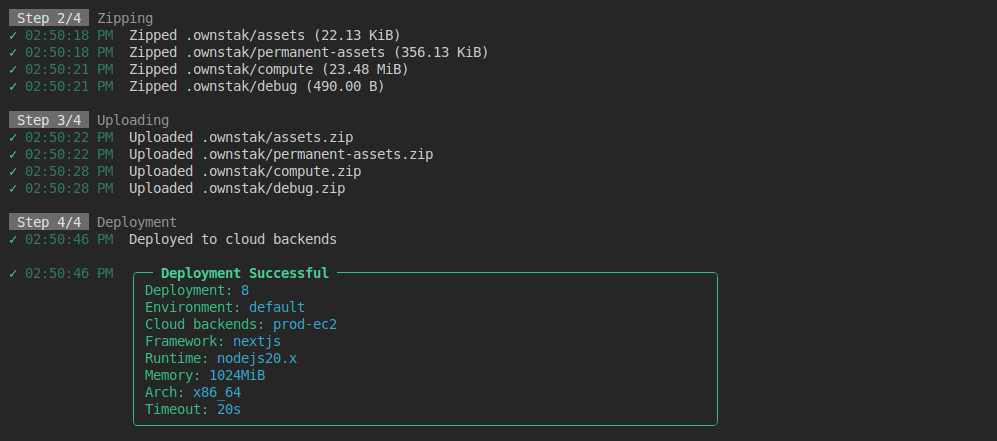
Your project is now live and deployed to your organization's cloud infrastructure. You can visit and test it using the environment and deployment links provided in the output:
- Environment link – Always points to the latest deployment in a given project environment
Example:
my-custom-app-development.aws-primary.my-org.ownstak.link - Deployment link – Always points to a specific deployment
Example:
my-custom-app-development-10.aws-primary.my-org.ownstak.link
Advanced Configuration
Custom Build/Dev Commands
If your application requires a build step, you can specify custom dev and build commands that will be run during the build/deployment process (npx ownstak deploy or npx ownstak build):
import { Config } from 'ownstak';

export default new Config()
  .setFramework("custom")
  .setBuildCommand("npx vite build")
  .setDevCommand("npx vite dev")
Custom Framework Adapter
For more complex applications, you can use a custom framework adapter to hook into the build process:
import { Config } from 'ownstak';

export default new Config()
  .setFramework("custom")
  .setFrameworkAdapter({
    name: 'My Custom Framework',
    hooks: {
      'build:start': ({ config }) => {
        console.log('Starting custom build process...');
        config.includeAsset("dist/**/*.{html,json}")
      },
      'build:routes:start': ({ config }) => {
        console.log('Adding custom routes...')
      },
      'build:routes:finish': ({ config }) => {
        console.log('Adding last route...')
      },
      'build:finish': ({ config }) => {
        console.log('Custom build process completed');
      },
      'dev:start': ({ config }) => {
        console.log('Starting custom development server...');
      }
    }
  })
Best Practices
| Practice | Description | Example |
|---|---|---|
| Environment Variables | Always use environment variables for configuration instead of hardcoding values | process.env.API_KEY; |
| Graceful Shutdow | Implement proper shutdown handling for production | process.on('SIGTERM', () => { server.close(); }); |
| Error Handling | Implement proper error handling and logging | app.use((err, req, res, next) => { console.error(err); }); |
| Security Headers | Add security headers for production applications | app.use(helmet()); app.use(cors()); |