Overview
GitHub Actions allows you to automatically deploy your documentation or applications to OwnStak whenever you push changes to your repository. This guide will walk you through setting up a complete CI/CD pipeline.
Prerequisites
Before setting up GitHub Actions, you need to:
- Have a GitHub repository with your project
- Have an OwnStak organization set up
- Have the OwnStak CLI installed locally (for initial testing)
- Test that
npx ownstak deployworks locally for your project. See our CLI Commands for guidance.
Step 1: Create a Service Account
Service accounts provide a secure way to authenticate GitHub Actions with your OwnStak organization without using personal credentials.
Creating the Service Account
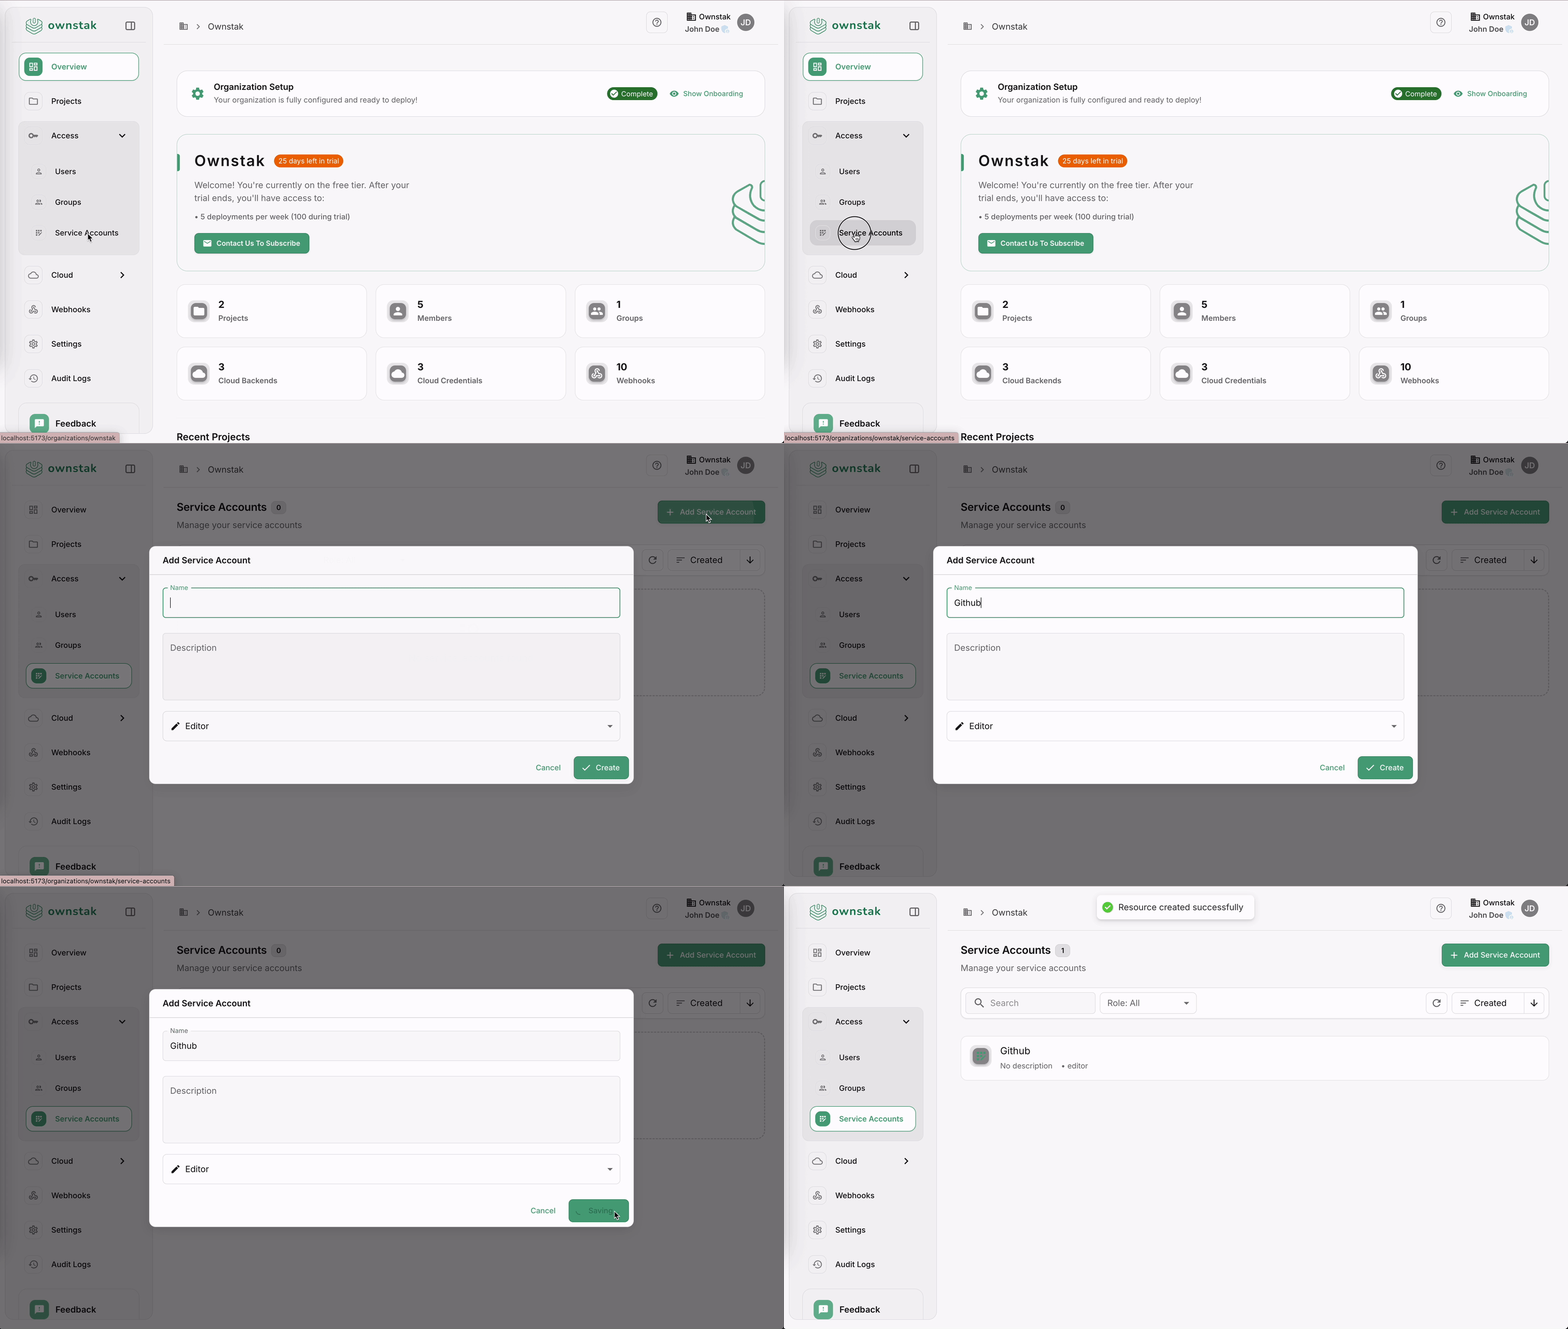
- Go to your OwnStak organization
- Click on Access in the sidebar
- Select Service Accounts
- Click Create Service Account
- Enter a descriptive name (e.g., "GitHub Actions Deploy")
- Add an optional description
- Select the Editor role, which allows you to deploy projects.
- Click Create

Step 2: Generate API Key
Once your service account is created, you need to generate an API key for authentication.
Creating the API Key
-
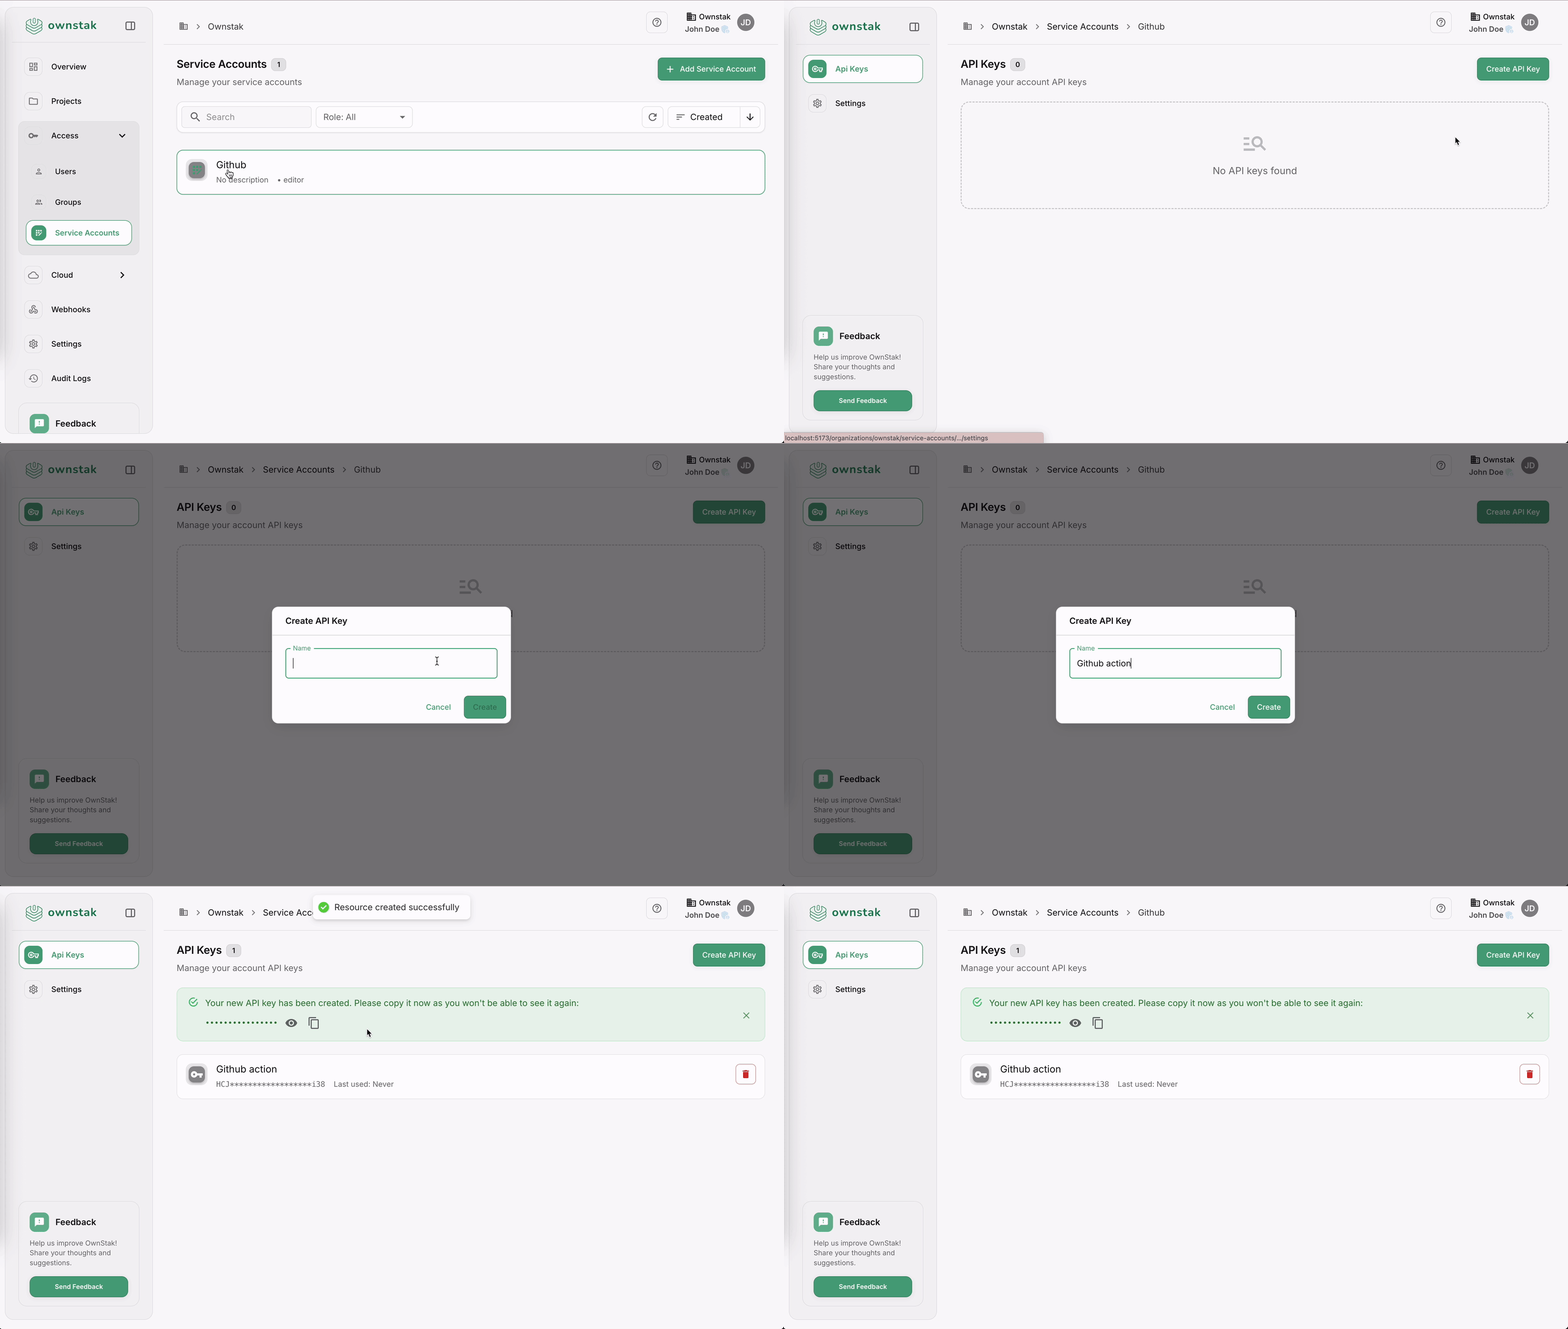
Access Service Account:
- Find your newly created service account in the list
- Click on the service account name
-
Generate API Key:
- Click Create API Key
- Enter a name for the key (e.g., "GitHub Actions Key")
- Click Create
-
Copy the API Key:
- Important: Copy the API key immediately and store it securely
- The key will only be displayed once and cannot be retrieved later
- If you lose the key, you'll need to create a new one

Step 3: Configure GitHub Secrets
GitHub Secrets allow you to store sensitive information securely in your repository.
Adding the Secret
-
Navigate to Repository Settings:
- Go to your GitHub repository
- Click on Settings tab
- Select Secrets and variables → Actions
-
Add New Secret:
- Click New repository secret
- Name:
OWNSTAK_ORG_TOKEN - Value: Paste the API key you generated in Step 2
- Click Add secret
Step 4: Create GitHub Action Workflow
Create a workflow file that will automatically deploy your project to OwnStak.
Workflow File Location
Create the workflow file at .github/workflows/deploy.yml
Workflow Configuration
name: Deploy site to OwnStak

on:
  push:
    branches: [ main ]

jobs:
  deploy:
    runs-on: ubuntu-latest
    env:
      OWNSTAK_ORG_TOKEN: ${{ secrets.OWNSTAK_ORG_TOKEN }}
      OWNSTAK_ORGANIZATION: my-organization
      OWNSTAK_PROJECT: my-project
      OWNSTAK_ENVIRONMENT: my-environment

    steps:
      - uses: actions/checkout@v4

      - uses: actions/setup-node@v4
        with:
          node-version: 20
          cache: npm
          cache-dependency-path: package-lock.json

      - name: Install dependencies
        run: npm ci  # or yarn install / pnpm install depending on your package manager

      - name: Build and deploy to OwnStak
        run: npx ownstak deploy --api-key ${{ env.OWNSTAK_ORG_TOKEN }} --organization ${{ env.OWNSTAK_ORGANIZATION }} --project ${{ env.OWNSTAK_PROJECT }} --environment ${{ env.OWNSTAK_ENVIRONMENT }}
Configuration Variables
Update the following environment variables in the workflow file:
OWNSTAK_ORGANIZATION: Your OwnStak organization slugOWNSTAK_PROJECT: The project name in OwnStakOWNSTAK_ENVIRONMENT: The environment name for this workflow (e.g.,production,staging)
For more information about OwnStak deployment options, see the CLI Commands documentation.